Next - to plan some sort of design. I've decided that the main body will be made up from pieces sized
250mm x 200mm with a gusset of 90mm wide
The strap pieces will also be 90mm wide.
There will be various pockets inside and out, and a flap, edged with bias binding.
This is a sneak preview of the end result:

Starting the Bag:
Day One: Choosing the fabric is fun. Especially when there's quite a wide choice in the cupboard from the my rather over enthusiastic ebay habit! (I'm not even going to look at ebay any more - as bargains are so hard to resist.....)
However all the best plans for sewing can go astray, for no sooner had I laid out all my fabric and thought about starting to cut things out, than my sister and her family arrived to take advantage of our snow.

Obviously I had to pause to go out for a bit and see the action.
*******************************
Day Two: Finally a free morning & I spent a lot of time cutting out pieces of fabric and thinking about how the bag would all fit together. I find stickies are very useful so that I don't forget what each piece is intended to become!
Cutting out the Fabric Pieces!
This always takes longer than anticipated.....

The Bag Outer (and pockets)
- Front and back (blue trousers) 200 x 250 mm
- Gusset pieces (blue trousers) 1 of 270 x 90 mm plus 2 of 220 x 90 mm
- Extra side pockets material (blue trousers) 2 of 150 x 90 mm
- Front pouch pocket 250 x 200 mm and pocket flap 150 x 120 mm (in both red flowers outer and yellow fern inner)
- Back pocket (purple fern) 250 x 300mm and extra strip (blue trousers) 250 x 90mm
- Extras: 2 x 100mm strips of bias binding + a red bobble + a red button
Bits required for the rest of the bag detailed as they are needed below.
*****************************
Day Three: I started sewing one section at a time .....
Pouch Pocket on the Front of the Bag.
I want the pocket to be 3 dimensional, so the first thing is to mark off the corners. The squares marked are 50 mm sq. and positioned on the bottom two corners on the long side of the fabric for the pocket.

At each corner, I folded the fabric along the 45' angle and stitched along the line I had drawn. This was repeated for two corners on one long side, of both pieces. They were then matched up (right sides facing) and joined along 3 sides.

Leaving the top side open for turning right side out. Once turned right side out, the open edge was then turned in and under (I measured 100mm from corner to top) and top stitched closed. This is now read to attach.

Care needs to be taken when attaching the pocket to the bag outer. I measured the actual size....

and then drew that onto the bag outer.

Then stitching close to the edges of the pouch pocket, I attached it to the bag outer.


Next the pocket flap. I folded both pieces over and trimmed a curve for the free corners of the flap.

I'm using a red hair bobble as a fastener. It gets placed between the two flap pieces before sewing.
I then sewed around the 3 sides, and reversed the material, to reveal the bobble button loop. Next the top edge was turned in, and I top stitched around all the edges.

Then I placed the pocket flap in position above the pocket itself on the bag outer and stitched it down.

A final tweak - I decided to take two small tucks in the opening of the pocket as shown.

And there we have it! The pocket on the front side of the bag.... just the button to sew on.

**************************
Flat Pocket on Back of Bag Outer.
I cut out a lining piece of 250 x 300 mm, and then a used a 250 x 90 mm strip for section above the pocket.Note: I could have done this using another large piece of blue outer material, (and not worried about lining the pocket) but I seem to have run out of blue material, so instead the blue bits stay outside and the purple lines the pocket..... if you see what I mean. If you've loads of outer material, then skip forward, and make this pocket in the same way that the side pockets are made....

Right sides facing, I joined the outer and lining pieces along one side (250mm side). I sewed a very wide seam as I didn't want to bother with interfacing, but wanted the top of the pocket to be firmer.

I then flipped the outer over (note turn under from the wide seem visible bottom right) and slide a little of the lining over and stitched down. This becomes the top of the flat pocket.


So that when the pocket is folded up, the back piece is the right size!

I stitched holding stitches down the sides. This seam will get stitched again as it is sewn into the bag.

Side Pockets and Sewing up the Outer.
So that's the front and back pockets sorted. Now the side pockets.

I just ran a little bias binding along the top of each side pocket piece and again used holding stitches to attach them to the side gusset pieces.

Next to join in the gusset pieces. Right sides together, line of stitching and angle off at the end.... like so!

Fold over at 45'


Add 3rd gusset piece and the bag is starting to shape up:

Use the same technique to attach the back of the bag to the existing gusset pieces. Then stitch closed the corners of the gusset pieces.

So now the bag outer looks like this.

*****************************
Day Five!
The Front Flap and Flap Pocket
- Flap in blue trouser material and purple fern: 260 x 230mm
- Flap pocket two pieces in red and green fern 160 x 120mm and 160 x 140mm
- Bias binding in pink flowers

Pocket made using the two bits of fern material
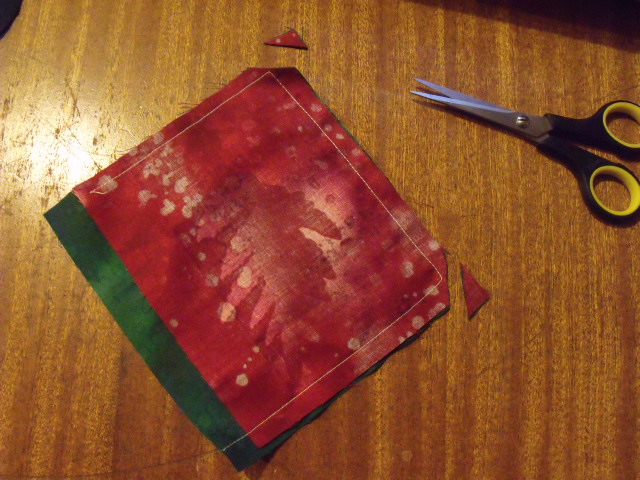
And stitched on to the blue trouser part of the flap.

Bias binding is then used to join the two flap pieces.

And the flap is stitched onto the bag outer.

Outside looks good, but inside still has rough edges.

Bag Lining:
Again the slow bit is adding all the detail before making up the bag!
The pieces are:
- Bag lining (red flowers) 1 of 220 x 250mm and 1 of 200 x 250mm
- Zipper pocket Lining (yellow fern) 1 of 220 x 250mm and 1 of 200 x 250mm
- Gusset pieces each 90mm wide
- Extra fabric pieces for side pockets (as on outer) and a small pocket if desired.

The two larger pieces of the bag lining and zipper pocket lining are cut horizontally at the level required for the zip. Approx 25mm down .

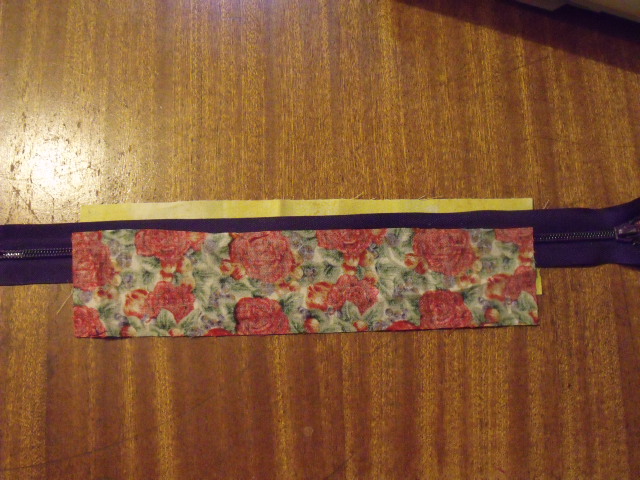
This is repeated for the larger pieces.

The smaller zipper lining piece is then sewn on behind.

And the extra bits of zip removed. This makes the back portion of the lining

I've added a few pockets, but this shows the lining pieces ready to be joined up.

Remember to leave an opening in one bottom seam for turning the bag the right way out again after the final stitch up.....

So here's the bag lining.

The Strap and the Final Putting together of the pieces!
- Strap is 1400mm long and strips are 90mm wide in both blue and red flowers
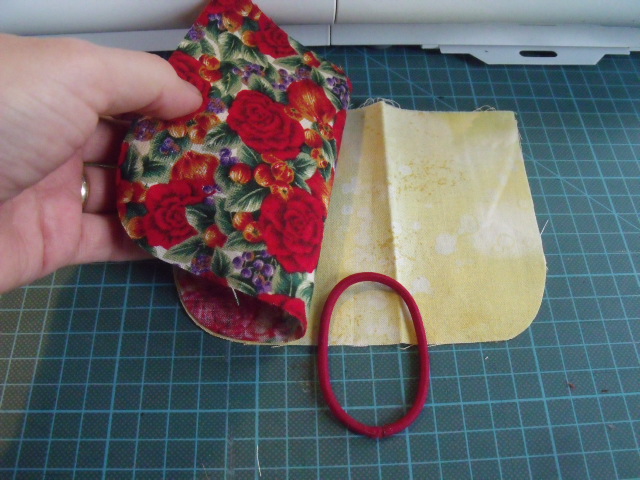
- I've re-used a few pieces from an old bag.

I got hubby to remove one of the clip portions off the bits below - leaving a plain oval ring...

Strap sewn together and turned right way out.

I folded the edges over again and top stitched. Probably not the easiest way to do this, but the buckles were narrower than the strap I had originally intended!

I cut one short piece of strap, and threaded the long piece as shown below. Then sewed the loose end in the middle of this picture onto the piece below it. This makes an adjustable length strap.

Like so. The second clip was threaded onto the strap to be a key holder.

I tacked the strap in place onto the main bag.

Which is starting to look like something now!


I don't much like using pins, but at this stage it is essential to get the seams joined up as the inner and outer are joined together.

Love this bit.... pulling the bag right way out!

So before tucking the lining into the bag, the gap needs to be stitched up...


Those straps should stay well attached....

So now, looking smart..... EXCEPT... I no longer like the front pocket!
So off it comes!

Yup.... like that better!


Oh and there's also the case of the missing red button - I'll need to do a little searching, but I KNOW I have the perfect button somewhere.
Hope you enjoyed that..... it took a bit longer than I intended!
No comments:
Post a Comment
Thank you for visiting my blog. I'd love to hear what you think so please do leave a comment - or even just a smile.... :-)