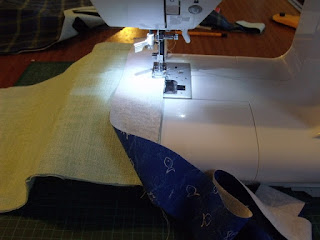
So I decided to make a custom cover for my daughter's new computer....
So here are the pieces cut out to the size of the computer - and back pieces big enough to produce a flap. I am using an oddment fleece piece as wadding..... and a couple of pieces of curtain weight material for the outer and inner.
Velcro was sewn onto the front, with the fleece as backing to help secure it.
The corresponding velcro pieces were lined up on the inner back. Again I put the fleece behind the velcro. I marked the position of each one in pencil.
I don't much like sewing on velcro! So I took a little diversion to photograph Patsy, my loyal terrier, curled up guarding the extra fabric!
My sister calls her "Velcro Dog" as everything sticks to her curly coat.... notice the pieces of thread!
Sometimes I think she'd love to be human!
Okay back to the computer case. I trimmed off the corners of the velcro after sewing.
Next I added the gusset.... I sewed the fleece in with the piece that is to be the outer. We decided to do a contrasting gusset piece.
Then fold gusset back at same angle from the corner.....
.... and then fold down, and continue stitching. Easy when you know how!
Same approach is taken once sewing the gusset to the other outer piece:
Last minute we decided to put a pocket in the inside. So, I just cut an extra piece of fabric - doubled over to match the front lining piece. It will all get stitched in as the lining gusset is sewn in.
Same trick - just without the fleece this time....
Then other lining piece was sewn in:
Now I have the two main pieces: the inner and outer. To join them start with each "the right way out", then the lining is pulled over the outer...
Like so....
AND AT THIS POINT I NOTICE THAT MY BITS DON'T MATCH UP!
Not sure why that happened!
So, I stitched on a little contrasting strip to the shorter outer flap! ;)
I love this bit! Pull the bag out through the gap in the lining:
And I then just stitched up the hole, by just folding the raggy edges in and over stitching.
Finally turned all the bits the right way, and over-stitched the front opening and around the edge of the flap.
One final little picture I took... I really hate having to stop to wind up bobbins... I was very lucky to come across this box of pre-wound bobbins on ebay! A tenner well spent I think!
Hope somebody has some fun with this. I quite enjoy just starting to sew and seeing where it takes me... I quite like this one!


No comments:
Post a Comment
Thank you for visiting my blog. I'd love to hear what you think so please do leave a comment - or even just a smile.... :-)