Saturday, 10 November 2012

Messing around with Sewing Machines

2012 has got to have been the year for Sewing Mania in our household.  Early in the year I'd got out the sewing machine that I inherited from my grandmother (a 1934 Singer) and started making various little things.

And the family got interested too       .....  (my god-daughter on the left ;) )


And to keep them all from borrowing my machine all the time I went onto ebay and bought some more second hand machines.  One is dated 1890!  And - with minor tweaks - they all work beautifully!

My eldest daughter got very into making quilts:


And managed to quilt it up using the old Singer rather well....


Other little projects were less ambitious 
And sometimes a bit silly!  Say Hello to Honey the mobile pin cushion.


And here's my dog Patsy in her new rain coat!  I made the mistake of giving her a haircut in February.... and then realised she was a bit cold on walks!  This is made from an old fleece and an old anorak.


These Singer machines are so durable and solid.  All in all a day around the kitchen table with sewing machines is a great way to spend a day.  This picture was probably taken in Feb 2012, and we've had a couple more sessions since! 


 "Stitch and Bitch" as a friend calls this sort of session!


Sunday, 4 November 2012

Purse / Wallet Step by Step

I used the tutorial found here:
http://modestmaven.blogspot.co.uk/2012/02/bi-fold-wallet-tutorial.html

To make a wallet style purse like this:


I chose my colours... here pictured with labels of sizes:


After applying interfacing to the required bits, I sewed up the tab, and snipped off the corners.


Turned it right side out and ironed and stitched around the edge


Sewed 3 sides of the lining (for the section for bank notes) - leaving a gap open for reversing the whole thing later.  Top edge not sewn at this stage either.


Next took the long strip for the credit card section. Set a paper card up 4" down.


Folded the 4" back underneath and ironed.


Then flipped the material over the card (keeping it in place as a marker) and ironed the fold created.


Pulled the material back down, and, leaving  small bit of the card visible folded & ironed again.


Repeated the flip up over the card & ironed again.


And down again and iron.


Made a total of 4 folds (3 card pockets) like this.  Ironed all in place.


Ran a line of stitching up either side and trimmed excess.


Next the coin pocket.  I decided to add interfacing to the whole outer section and also the flap end of the inner.  Trimmed the flap end to a slightly narrower and rounded shape.


Stitched 3 sides, right sides facing.


Turned inside out.  Then stitched the middle section of the coin pouch to one side of the wallet inner, leaving an offset as shown.


The second side was likewise stitched down.  As the pocket does not lie flat (ie it can bulge with coins) I took a fold in the centre of the material, and stitched it down.


Turning up the front of the coin pouch, shows the extra room this leaves for coins.


Both sides were then stitched down.  The card holder section was stitched into place on the opposite side.


Next tab, that will close the whole wallet, was stitched to the inner.  The side that will be outermost, left uppermost!


Then the outer is placed on top of the inner and stitched down on 3 sides.


Next it is turned right way around.


And the outer (right side out) is placed inside the lining (wrong side out).
The outer may need to be doubled over at the bottom to make it fit, this is okay.


The edges are joined.  This is the fiddliest part of the whole project.  Once stitched, use the gap left in the lining to pull the main part of the wallet through....


It should look like this.


Sew up the hole in the lining by folding the rough edges under and over stitching.  This bit will be hidden inside the bank note section.


Then I tucked the lining inside the wallet and top stitched around the opening.  Also I top stitched around the remaining 3 sides of the outer.

Now all I need to do is add fastenings - I will use velcro I think.


Well it's not perfect, but I'd a load of fun doing it!  :)


PS I sewed on velcro after making the wallet - but this would have been much easier done during the making-up stages!  


Friday, 26 October 2012

Funky Skirt from Old Jeans with Pics!

So, I've been invited to a 50th birthday party where the theme is Funky and Fun.  So I thought I'd try my hand at creating a funky skirt from an old pair of jeans and some material oddments. 

I took inspiration from some of the items found here: http://www.etsy.com/shop/ShabyVintage

The end result looks like this: 


So I started with an old pair of jeans.  I cut the legs off....


Then removed the crotch and folded over the extra material.


And stitched it down with two lines of stitching.


Same at the front.


Inside view of the stitched over bits.  Excess material cut away.


Next I ran a line of fancy stitching around the hemline.  However I didn't hem it as I'm going to fray the fabric instead.


At this point I decided to do something with the pockets at the back and took one off... ummmm Old dead washed tissues! Nice!


 I cut the extra fabric off the pocket.


And then went back to fraying the hemline, while debating what colour to use for the pocket.


I rubbed the cut ends together to start to produce a frayed effect.  It's slow and fairly ineffective.  Middle daughter tells me a couple of goes through the washing machine and tumble drier will do the trick.


 Back to that pocket.  I covered the denim in the material of choice and then stitched the pocket down, just slightly higher than before to show off the dark denim underneath.


Then I decided to rip off the other pocket.  Thankfully this one was tissue free, but sadly I ripped the last bit... This requires some thought.


Perhaps I'll just make a bigger hole and fray the edges a bit.  Make it look part of the design.....


I sewed another fabric in behind the hole... I think it qualifies as "funky".  :)


And then I got carried away and made the hole much bigger, and frayed all the edges up.  I'm quite pleased with this.  Maybe one of my daughters might even call it "cool"?


So now the front looks bare, and that red/pink fabric is just crying out to be made into a heart.


I stitched it down with a zig-zag stitch.  (First time I've done this.... and it's simpler than I thought.)


I rather like this.


My new-found confidence with fancy stitches, leads me to experimenting with the pocket and some pink thread...


At this point, it's time to take a break....  and put the skirt through the wash to see if that hemline will fray up a bit....... Later, I want to add a flounce of fabric to the bottom.....  more to follow .....

***************************************************

Adding the flounce:

So I found an old silky scarf that I don't wear and chopped it in two length wise.  Then I started pinning.  I
started with the corner of the scarf above the hem line so it's not seen.


More pinning.  Pins going vertically downwards so I can sew over them later.


First piece all on:


Starting with the second piece of scarf.  Again the corner is lifted to above the hemline of the firs piece of the flounce.  I used a second set of pins, and the chopping board helps keep the pins in the right place.


And on.....


Okay - all attached.


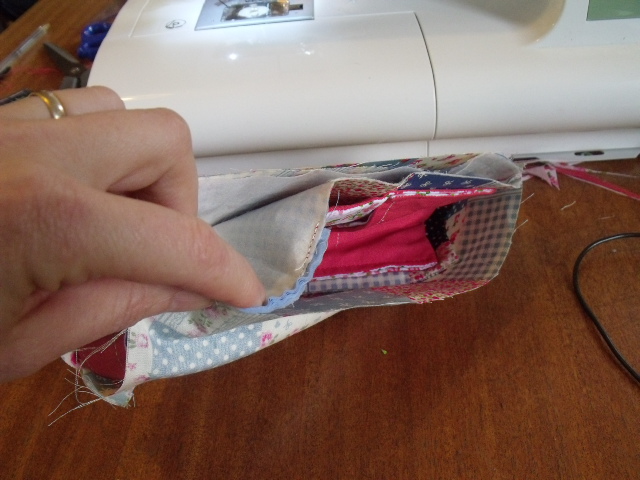
 Time to turn it the right way out...


And I'm not at all convinced by the asymmetric look.  :-(

So - after the re-pinning:


I stitched from the top, and just ran over all the pins.


Then removed the pins and trimmed the excess material.


Gathered some of the trimmings into a funny rosette flowery thing.


And stitched it on too:


I'm quite pleased with the overall effect!  It is a fancy dress party after all!


*******************************

If you have used this photo sequence to create your own funky skirt,  please consider making a donation to the Let's Do it for ME   fund.  Donate page here: Donate to Let's Do it for ME.  This group are raising funds for biomedical research into ME (Myalgic Encephalomyelitis - also sometimes called Chronic Fatigue Syndrome - although in reality it is much more complex than simple fatigue.)